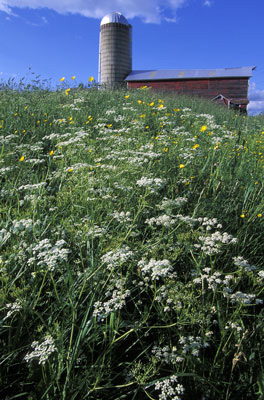
 The other side of mastering depth of field is photographing the grand landscape. In part 1 I talked about photographing a portrait where you will need both the appropriate f-stop and subject. The correct f-stop will allow only your subject to be in focus and the correct subject will have enough distance between it and the background to allow an out of focus, poster board, background.
When you are photographing a landscape chances are that you will want the entire picture to be in focus. The extreme circumstance of this is when you are using a wide-angle lens and your composition goes from a foreground clump of flowers 18″ away to a mountain range at infinity focus. The question I am always asked on my workshops is where do you focus when do a shot like this? If you focus too far away your foreground will be blurry but if you focus too closely your background will be blurry.
In the old days we used to call this hyperfocusing. Hyperfocusing is a technique of maximising your focus so that your image will have the greatest depth of field for whatever f-stop used. When you hyperfocus you are picking a point of focus which will allow the depth of field to reach both the closest and farthest points in your composition.
This is not an easy thing to do and it is nearly impossible to estimate without some aid.
Used to be a time when camera lens actually had very useful little hyperfocusing scales on them that were accurate, easy to use and very handy. Not wanting to make photography too user friendly most lens makers did away with these little scales leaving us a bit high and dry. Then little charts started to appear that listed every possible f-stop and distance combination and then apparently told you where to set your focus. The problems with these charts is that I never really figured them out, I never had them with me when I needed them and I never had a tape measure with me to measure my composition. Then some cameras came out with a depth of field program that automatically set the focus properly. My problem with these is that first I don’t trust them and second I don’t trust them. Remember: autoexposure, autofocus, oughtoknowbetter!
So what is a photographer to do? There are two, low-tech techniques. The first one assumes that a majority of the time when you are thinking about hyperfocusing you are using a wide-angle lens (typically between 20mm and 35mm), you are using your smallest f-stop (usually f-22 or f32), the closest point in your composition is less than 3’ away and your camera is angled down. (You may not be angling your camera down to do your grand, sweeping landscapes but you should be. When you do so you draw in the foreground and make your composition much more compelling and inviting.)
When this is the case simply focus in the center of your viewfinder. That point will almost always be 4′ to 6′ away from you. I could make this more difficult but it really is that easy- focus in the center of your viewfinder. If for some reason you are not doing your sweeping landscapes with a wide-angle lens, small f-stops, interesting foregrounds and downward angled cameras you need to avoid wide open spaces or not take your camera with you anytime it is light out. Sorry, you needed to know.
If you want to be sure of this focus point or if you are distrustful of really easy, helpful techniques you can double check your focusing point by multiplying the distance to the closest point in your composition by two or three. This is John Shaw’s technique. If the closest point of his shot is 2′ away he will focus 4′ to 6′ away. He then fine-tunes the focus by using his depth of field preview button. When you do this you will notice that you have focused in the center of your viewfinder.
There you have it, two easy ways to solve your hyperfocusing problems. Now return your tape measure to your junk drawer and put all those silly cards away with all those other silly photography cards you have accumulated over the years and go out and take some pictures.
