In my previous post I wrote about the options I use and don’t use when I am trying to photograph in less than ideal light. A vast majority of the time I just wait for better light to solve my bad light problems. If I am photographing something small I will most of the time use a diffuser and rarely use a reflector (I use a reflector when I have someone to hold the reflector and I am photographing large mammals like horses, people and animals in controlled situations). I don’t own a flash so I don’t use fill flash anymore and I don’t do any HDR photography, ever. I don’t like the way it comes out and I don’t like fiddling with it endlessly in the computer.
 But sometimes I just have to take the picture in bad light. This almost always happens when I am on a trip and I don’t have the option of waiting or coming back later when the light is better. And if your subject is moving even using HDR is not an option (the multiple images will probably not merge correctly). Being forced to photograph in bad light happened a number of times on my recent trip to Uganda when I was photographing the local people in mid-day sunlight. My preferred solution is to move the person to a shaded spot but sometimes there just isn’t a shady spot nearby. In this case you have two options with a dark subject and very bright light- 1. purposely overexpose the shot to get details in the shadows and then in the computer darken the highlights or 2. Do what the camera says to do (I always shoot in aperture priority) which will always underexpose a bright scene to get details in the highlights and then in the computer brighten the shadows.
In other words you can overexpose to lighten the shadows or underexpose to darken the highlights.
Which do you do? It all depends if the information in the shadows or highlights is most important. If the person’s face is in the shadow I would purposely overexpose the image because I will want to see the face but if the person’s face is in the sunlight I would follow the camera and thus underexposing the image so the rest of the picture isn’t blown out. If the person’s face is in both sunlight and shadow you are almost always out of luck for a great shot. You’ll get a useable one if you meter carefully but you will never get a beautiful shot. Beautiful photographs of people are always taken in low, soft light or open, shaded light.
The old farts out there are screaming right now about the benefits of fill flash and I don’t deny them. I just don’t want to deal with flash of any kind and since Lightroom came out I have found a tool that works better for me than fill flash. (see below)
 I use Lightroom for all my processing (I haven’t opened Photoshop in 3 years!). There are several ways to effect the lightness or darkness of a part of an image in Lightroom. You can use the Graduated filter tool in the Develop Module if you want to change the exposure on a relatively large part of your picture (the sky for instance or a sunlit corner) or you can use the Adjustment Brush (what I call the magic wand) if you want to lighten or darken a small, specific area.
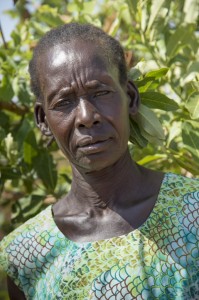
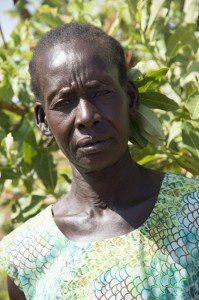
I found the lady shown above on the roadside in the middle of the day. The light was terrible. Because she was so dark-skinned I decided to overexpose the picture so I would have the best chance to get details in her shaded face. In Lightroom I used the Graduated filter to darken the lower left corner of the picture and I used the Adjustment Brush to lighten her face. This has the effect of using fill-flash when taking the shot. This is the picture of how the photo looked without processing.
When the light isn’t so harsh simply using the shadows slider and sliding it to the right is often enough to get good results.
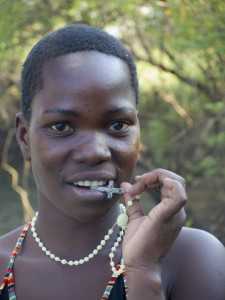
 When I photographed Feebee the light wasn’t as strong and I was concerned about the bright highlight on her head so I underexposed a little so the highlight wouldn’t blow out. Once a highlight blows out there is very little you can do to fix it (unless you are a Photoshop Wizard) so I try to always adjust my exposure to control bright, compositionally important areas. I then lighten up the shadows with the Shadows slider and slid the Highlights slider to the left to subtly darken the highlight on her head. Finally, I used the Adjustment Brush to darken the background behind her head.
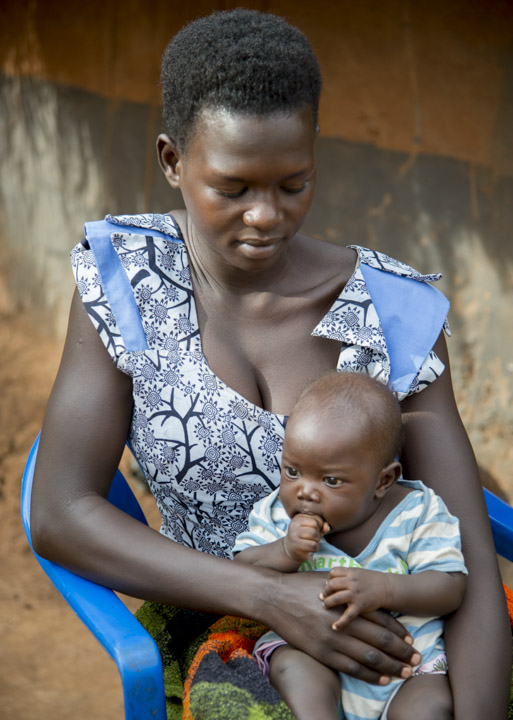
Each of these changes took no more than 20 seconds to do so don’t think that I labored over them and worked with minute detail to get the look I wanted. A swipe here, a slide there and viola! the finished picture. I would’ve preferred to have a cloud come by when I needed it or to photograph each of these wonderfully cooperative ladies in beautiful soft light but at the time I was there that wasn’t an option. You do the best you can if you have to even when the light is awful.
Thank goodness for Lightroom!

